Office 365 for Education
An introduction to Sharepoint 2013 in Office 365 for Education
SharePoint allows you to connect, collaborate and create with other users and groups in your educational institution. You can set up group work spaces for staff, students and other groups, even down to the level of individual classes and subjects. Different guides in this series will help you to work through many of the parts in more detail. After using this guide, you will be able to:
|
1. Before you start
- You will need to check whether your domain verification has been completed and that you have qualified for the free Office 365 Education A2 plan.
- Complete the licence purchasing as explained in the first guide.
- Upload all your users, either individually or by using the bulk upload function.
- Check that all your new users have received their login details and have been able to access Office 365.
- It is usually a good idea if your users log in for the first time in groups where there is help available should they encounter any difficulty. You might want to do this by staff department and by class for students.
- Once this is done, they will be able to explore Office 365 for themselves while you build your site. This guide will take you through how to do that.
- When you have built your institution site, your users can become familiar with it. You can then gradually add other services such as Email and Video Conferencing to your institution Office 365 platform as they become more confident and advanced users.
- Your users will probably come back to you with lots of ideas on how to use Office 365. You might consider setting up a team to help with planning, training and administration.
2. Building your institution site
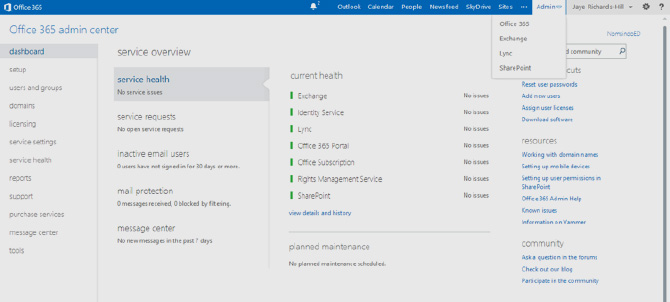
- Go to your Office 365 dashboard. On the top blue toolbar click on Admin. This will open a drop-down menu like this:
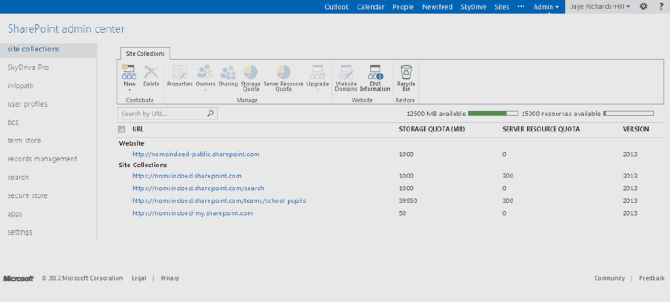
- When you click on SharePoint you will see this screen:
- There are lots of functions or commands that you won’t need to use at first. As you become more familiar with your Office 365 platform, you may start to use them.
- You will see in the screen above, there are links to one Website and four Site Collections.
- The website is open to everybody - both users and others who are not staff or students within your institution. It called public facing and this is where you might put information or publicity about your institution that you want anybody to be able to see.
- Click on Website. The next screen will open:
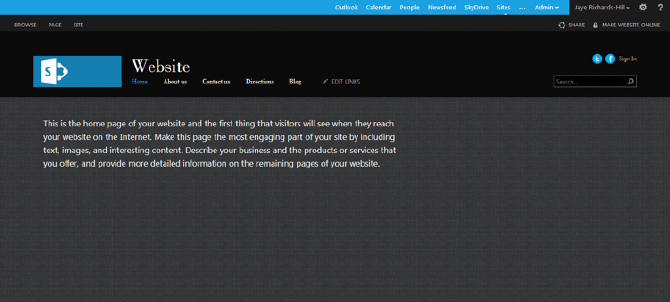
- How to build your institution website will be explained in another guide in this series. For now, explore some of the functions by clicking on the command buttons. You will see that it is simply a case of adding text or importing images to the different parts of the website pages.
- Your Office 365 website is offline and only visible to your users until you are happy to make it available to anybody. This is called publishing it.
- Your website has opened in a new page. Close this down and return to your SharePoint Admin center page:
- Below the link to your external website you will see four sites in the Site Collection that has already been created and suggested as a part of your Office 365 Education plan.
- These are suggested sites to use in your institution. There are four different types of site shown here. From top to bottom, these are Team site, Search page, Student discussion forum and Personal site. You can explore these by clicking on the links and going to each of the site pages.
- Separate guides will explain how to use these types of sites.
- The other functions in the menu on the left side of the screen are all administrative functions for SharePoint. Don’t worry about these at this time. You will discover how and when to use these as you become more familiar with how everything works.
- The other way to create new team sites is simply to go to Sites on your top blue toolbar and then click on +new site. Simply follow the instructions that appear on the screen to create your new team site.
3. Creating new site collections in your institution
- On the Site Collection toolbar above your existing site collection, click on New. The following screen will open:
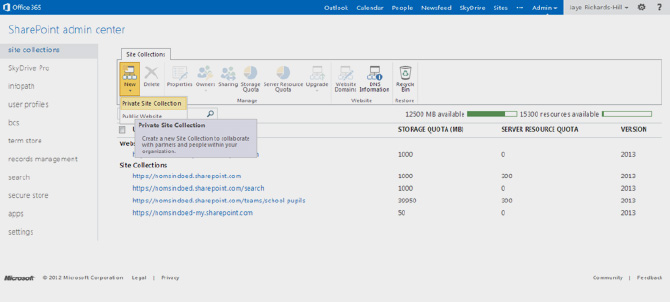
- Click on Private Site Collection. You will now see the following screen appear:
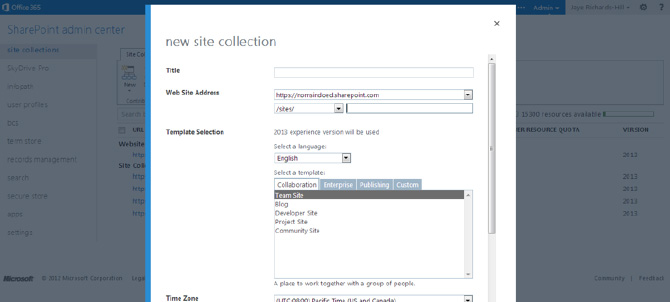
- You will now need to complete a few details and decide which type of site collection you’d like to create. This might be a Team Site collection for staff or according to subject, department, stage, grade, class, students etc.
- You have five different Collaboration type sites to choose from. Click on the options in turn to reveal a description of each type of Collaboration site. You could probably think of possible uses for all of the options. Exploring them will help you become more familiar and confident in using SharePoint. Remember, you can always go back to your admin screen if you get stuck!
- These five options under the Collaboration tab should be enough for most potential uses in your institution. The other tabs (Enterprise, Publishing and Custom) are for more advanced use.
- We will have a look at the first option, which is a Team Site, and go through the steps for setting up a Teaching Staff Team Site.
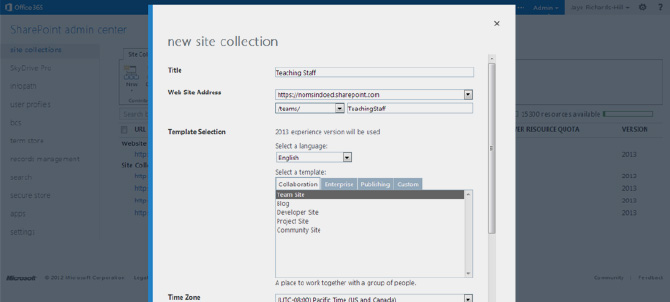
- Enter the name of the site in the Title box. We will use Teaching Staff as the name in this example. Enter this in the Web Site Address box as well. Change the other part of the web site address to /teams/. Your screen will now look like this:
- As you scroll down this window you will need to enter some more details. First, set your time zone by selecting your location from the drop-down menu.
- Next, you need to decide who will be the administrator of the site. Choose the name from the window that appears when you click on the browse icon (the square box) to the right of the Administrator box. The following screen
should load:
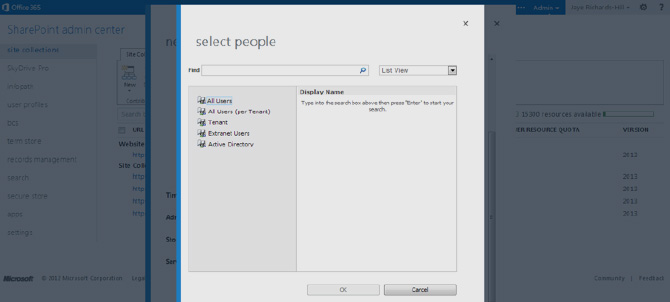
- The easiest way to find people is to click on the magnifying glass icon at the end of the Find box. This will bring up a list of all of your users. For this site collection, find select your own user name from the list and click OK. Your name will appear in the Administrator box on the New Site Collections page underneath the time zone selection box.
- Next, enter a figure for the storage quota for your new site collection. The maximum available amount for your new collection will be displayed next to the box. Enter 1000 MB (1 GB), which is quite a lot of storage space) for now. You can always change it later.
- Click OK and your new site will now be created for you. You may want to go and make some coffee as it could take ten minutes or so before your site collection becomes ready to use.
- It is called a site collection because you might choose to construct several subsites. This new site page you will be working from is a parent site that might have several subsites.
- You might decide to construct subsites for different grades of teaching staff, subjects or faculties all accessed from the main site page. Be aware, however, that the more subsites you have, the more storage space your parent site collection will need.
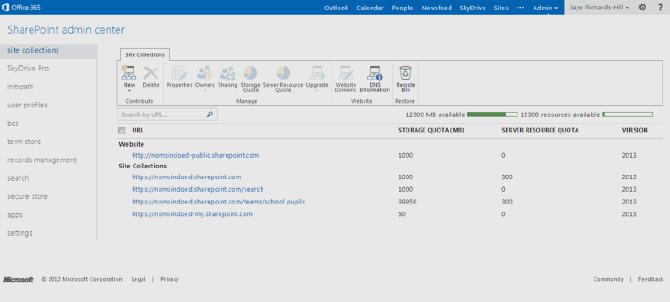
- You can see that a new site collection has been added in the screen here:

- If you select the box next to your new site collection, you will be able to use the functions in the toolbar above the Site Collections list to change the properties of your new site collection. You can manage the storage capacity, visibility (including people outside of your organisation who you might want to invite into your team) and administrator rights.
- You can now start to work on this new Team site collection. Click on the link to open it and your screen will look
like this:
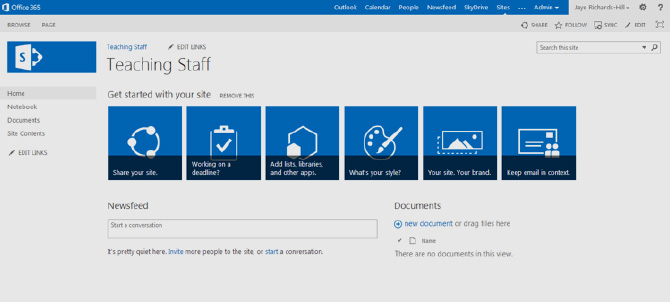
- Now have a look at some of the functions in the left-side menu bar.
- Notebook is a Microsoft OneNote team site for project collaboration. One of the features of Office 365 is the ability to edit OneNote and Excel Spreadsheets along with other users in real time. Using OneNote will be covered in a
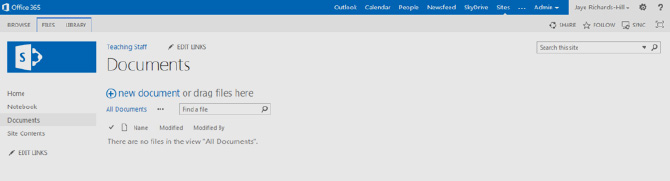
later guide. - Documents is where you are able to add documents for your team to view and download. Click on the link and the following screen will appear:
- If you click on Settings (the wheel-shaped icon) next to your name, this reveals a drop-down menu giving you all the site administrative functions. Click on Site Settings to make any changes to your site master settings.
4. Working with Documents
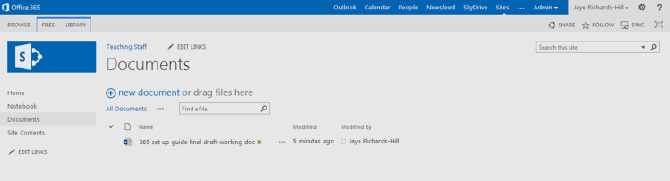
- To upload a new document, click on +new document and follow the simple instructions that follow. Your document will appear on the screen when it has been loaded.
- You can also drag and drop documents from your computer or tablet device into this area of your site collection.
- The documents will load onto your page and form a document library for your team site members. The screen will look like this:
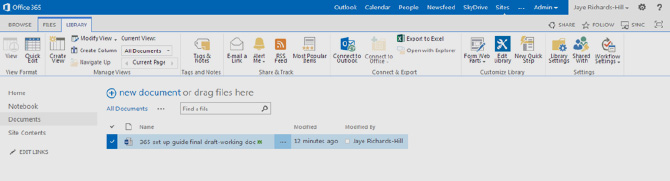
- Clicking on the Files tab at the top of the screen will open a further toolbar that gives you several functions for use with your documents and your document library once you and your team have uploaded a few more files.
- If you hover your cursor to the left of a document name, a tick will appear. Click on this and your document description will become highlighted. This allows you to use the functions on the top toolbar.
- You can open a document and edit it. However, if many users are working on a document at the same time, keeping up to date with the latest version can be difficult. SharePoint has a solution to this problem...
- You can check out a document to prevent anybody else from working on it while you are reading or editing it.
- When you are ready, you can check in the document to make it available to your team members again.
- You can see previous versions of the document by clicking on Version History.
- You can share a document with team members. This sends them a copy.
- You can set up alerts so that you receive an email whenever any changes are made to the document.
- Following a document means that any changes or updates will appear in your own personal site Newsfeed.
- There are other functions on this toolbar that you will not need to use until you are a more experienced user.
- There are another four useful functions on the right of the top toolbar.
- Share allows you to make people members of your team site. You would add all of your institution’s teaching staff by following the step by step instructions that appear on the screen.
- Follow creates a shortcut to this page in your site on your own personal site collections page.
- Sync creates a copy of your document library on your computer, which updates every time you are online.
- The last of these four functions lets you maximise your content window. Click on it and see how it focuses attention on your library contents. Click again to return to the original view.
- Clicking on the Library tab at the top left of the screen opens up the Library toolbar.
- Many of the commands on this toolbar are similar to those on the Document toolbar. Click on them to explore. Most are to do with the appearance and permissions settings for your library. You will start to use them more as you become confident in working with SharePoint.
- Your document library will also appear on the front page of your team site in a condensed format.
- Now click the Home command on the left menu. This will return you to the front page (landing page) of your team site collection.
- The remaining commands on the left side menu are Site Contents and Edit Links.
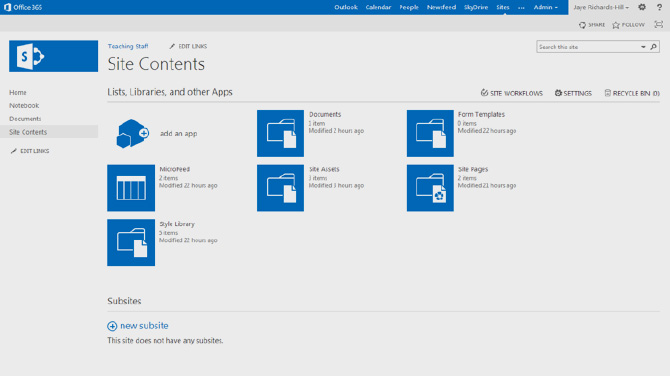
- Site Contents gives you information about what is in your site and about all of the subsites in the collection. You can also add apps to your site from here. Open Site Contents and the screen will look like this:
5. Adding Apps
- Click on add an app. This will give you a choice of several apps you might want to add to your site. They are easy to add by just selecting an app and following the instructions. Why not explore some of them? You might choose to add a Calendar, Picture Gallery or discussion board to your site page.
- Try clicking on the Links app. You will see a screen asking you to give your Links app a name:
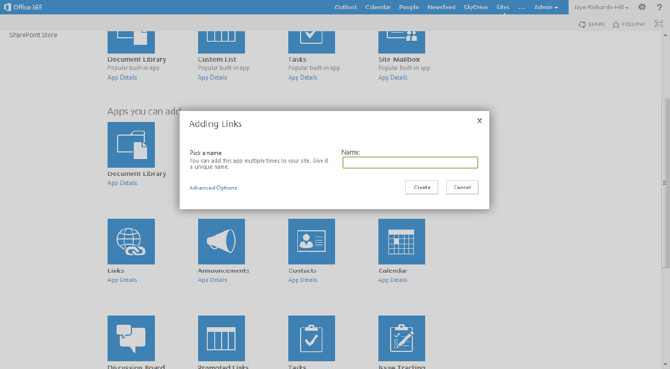
- Let’s call it Staff Weblinks. Type the name into the box and click on Create.
- Your new app will appear in your Site Contents:
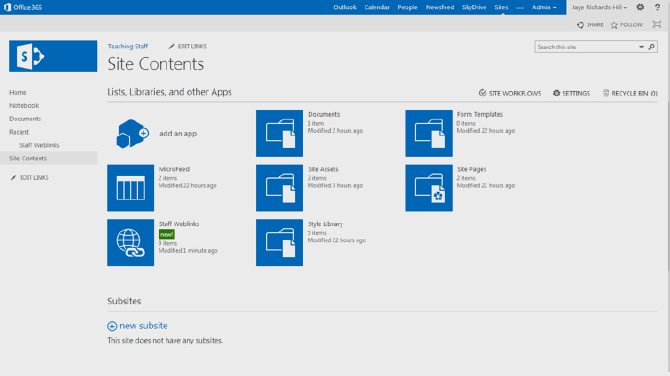
- It will also appear on the left-side menu. If you click on it, you can start to add Weblinks that you want to share with your team.
- Other apps you add will appear in this menu as well. The procedure for adding other apps is the same.
- Try adding the Tasks app and setting up a group task for your site collection users to complete.
6. Editing your site collections page
- Now return to the front page of your site collection by clicking on Home again.
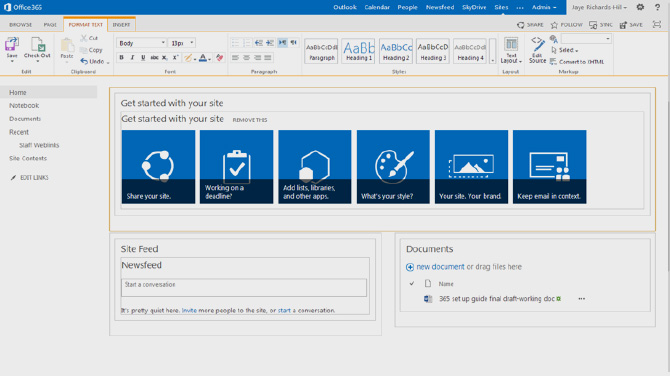
- The blue boxes contain suggestions for different functions you might wish to add when you become a more advanced user. Hover your cursor over each box to reveal a short description for each of them. When you have finished browsing the blue box suggestions you can remove them from your page by clicking on Edit on the top right of
your screen. - Your screen will look like this:
- You will see that the section with the blue boxes is called Get started with your site. This is called a Web Part. Click on Remove this to remove this Web Part from your site front page. A box will appear asking you to confirm this.
- Click Save in the top right of the screen. You will now be returned to your site front page and you will see that the blue boxes have been removed.
- The Edit function allows you to change the appearance of the different parts of your site collection pages, move parts around or delete them. These more advanced functions will be covered in later guides.
7. Giving users access to your site collection
All that remains now is for you to give your teaching staff users access to your site. To do this, you need to be on the front page of your site collection.
- Click on Share on the top right of your screen. This screen will load:
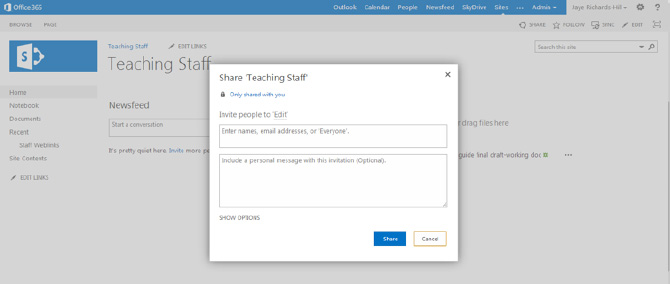
- You can now type in the names of the users you want to give access to. As you type their names, you will be prompted with their usernames to select. You can add multiple names in this box. Add a message in the box below and click Share. The users will be added to your team and will receive an email letting them know about the new site. Once they follow the site, updates will appear in their own Newsfeeds.
- If you click on Show Options at the bottom left of the window, you will be given a list of different permission levels that you can assign to your team members.
- The default setting is Edit. This allows them to add and check out documents and edit them.
- You might want to give some members rights to add resources, apps and links as well as change the layout of the site and set up subsites - for example, your department heads might want their own subsites. Select Full Control before inviting these users and let them know that they have these enhanced rights to make changes to the site in the message you send.
- You can also invite other users not in your team to view your site collection. They will not be able to check out or edit any documents as they are automatically set to the read only permission level.
8. Deleting your site collections
Should you need to delete any of your site collections, open the link to the one you wish to delete, and follow
these instructions:
- Go to the settings icon (the wheel-shaped icon next to your name at the top right of the screen).
- When you hover over this icon, the word Settings will become visible. Click on this icon and you will see the settings drop-down menu will appear.
- Select Site Settings from this menu and the full settings page will open in your screen.
- In the Site Actions group of functions, click on Delete this Site. (There are lots of different options and functions on this screen - you might want to take some time to explore them)
- Follow the instructions. You will be asked to confirm your request to delete. This is a safeguard that allows you to check that you are ready to delete and that you are deleting the correct site collection. You will then be given the option to click back through to your SharePoint dashboard.
9. Now think about hierarchies
As you add users to your team and they begin to gain more confidence in working with SharePoint, they will probably want to set up their own sites. As institution administrator, you will need to decide on an establishment policy about SharePoint sites hierarchy.
Your hierarchy is the way in which your site collections with their subsites are organised. You have many different
options, including:
- There might be main site collections for significant user groups such as Leadership Team, Administrators, Teaching Staff and Students. Subsites then branch off from these site collections such as different department subsites from Teaching Staff and classes and/or subjects from Students. This is usually called a vertical arrangement.
- Each department or faculty might have its own main site collection, with subsites for teaching staff, students and grades/classes. These might run alongside the other main site collections for staff and students.
- Each year group might have its own main site collection with subsites for teaching staff and students and further subsites for subjects and different classes.
Whatever site collection hierarchy you chose, you should plan it out carefully with your institution Office 365 working group. Otherwise, you might end up with a very disorganised structure that would then be much more difficult to fix at a later date.
SharePoint Guides - Further Reading
Setting up Sharepoint» Setup guide for SharePoint for Education
» Scenario: Setting up a public website
» Scenario: Creating a subsite
Download the full guide
Using SharePoint in education
» Setting up a personal SharePoint site
» Scenario: Using the Survey App
» Scenario: Using a team site in SharePoint
» Scenario: Setting up a student site
» Scenario: Class projects & assignment submission
Download the full guide