Office 365 for Education
User Scenario:
Setting up a student site in SharePoint
Maria de Bruyn is a deputy head teacher at Nomsindo High School. As she is head of pastoral care at the school, the Office 365 working group have asked her to set up and moderate a Student Information and Discussion site on SharePoint. There are several types of SharePointsites to choose from, including Team and Community sites.
The site will be for student-led discussions, to provide information such as school policies and rules, and to make communication between the school and the students much easier. Mrs de Bruyn feels that a community-style site will best suit these needs.
She logs into the school Office 365 site. She goes to the Adminmenu and clicks on SharePoint. In the site collections list, she sees that a student site has already been set up. There are examples of each the different SharePointsite types already created here, including Team and Community sites. She could set up other community-type sites for parents or staff by clicking on the New Sitecommand on the tool ribbon at the top of the page and then selecting Communityfrom the site type options that appear.
She clicks on the student site link, and then on the URL in the pop up window that appears. The student site then loads.- On the right side of the homepage, she sees a box named Community Tools. This contains links to a number of functions.
- These tools allow Mrs de Bruyn to manage the discussion posts and to create reward badges that she hopes will encourage students to contribute appropriately to the discussions.
- She works through these tools. Manage discussions and Create Categories help the administrator to organise the discussions and create different categories of discussion or subject threads.
- She considers making the school prefects administrators of the site to help with this task.
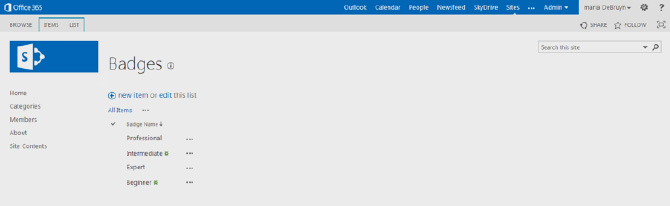
- She then clicks on Create badges. This is where students can be awarded achievement badges as an incentive to contribute. She sees that there are only two achievement levels (Expert and Professional) and so she decides to create some more.
- Mrs de Bruyn clicks on the + new item and goes through the step-by-step process of creating a beginner and intermediate achievement badge. These appear in the list on her Badges page. She will award these badges to students who contribute regularly to the site. Her screen looks like this:
- Mrs de Bruyn returns to her home page by clicking Home in the left menu.
- There are two links in the Community tools menu on the right that she has not looked at yet. Assign badges to members lets her award badges to the students based upon their contributions to the site.
- The Reputation settings link allows her to set the levels at which the students gain achievement points that can count toward their badges. She works her way through the information, changing settings where she thinks necessary. She is considering how many achievement points or which levels should merit the award of an achievement badge. Once she has finished, she clicks OK.
- She will need to delegate this job to her school prefects or student representatives.
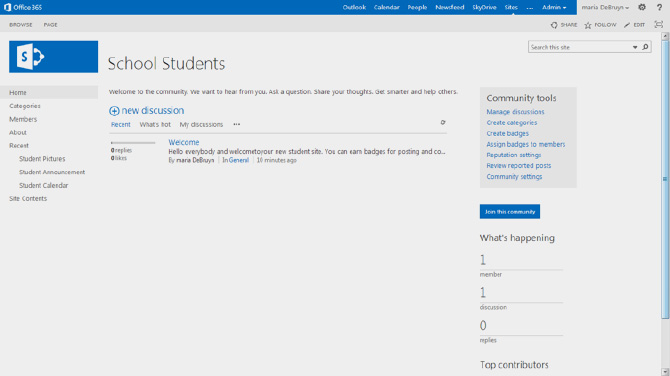
- She now decides to post a welcome message to her students and clicks on + new discussion.
- She enters her message title and text into the boxes that appear and clicks Save. She is taken back to the home page where she sees her new message.
- Mrs de Bruyn now clicks on Site Contents from the left side menu.
- She wants to add a Calendar to the student page, and so clicks on add an app and searches for the Calendar app from the choices that appear. She finds the calendar app and clicks on it. After giving it a name, she clicks Create and is taken back to her home page where she sees the Calendar app in the left side menu.
- She decides to go back to the list of apps and have another look at what is available. After browsing, she decides to add the Picture Gallery and Announcements apps to her student site.
- After doing this, she returns to her site home page. It looks like this:
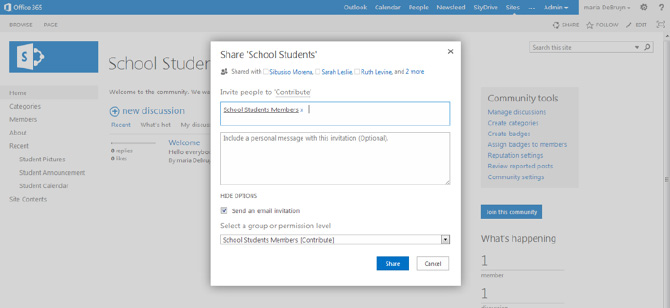
- Mrs de Bruyn is now ready to invite the school students to start using their new site. She clicks on the Share tab on the top right of her screen and works her way through the steps for adding users.
- Her school administrator has already set up user groups for teachers, staff, students, classes etc, so all Mrs de Bruyn has to do is select the Student Members user group, then choose their permission level. She sets this to Contribute. Her screen looks like this:
- She also adds some members individually to the site.
- She then clicks on Share to return to the site home page and has a look at some of the other things she can do
with SharePoint. - Mrs de Bruyn thinks that the page would look more welcoming with a picture of the school. She clicks on the Edit tab at the top right of the site home page.
- She can make changes to the appearance of the site in this part of SharePoint.
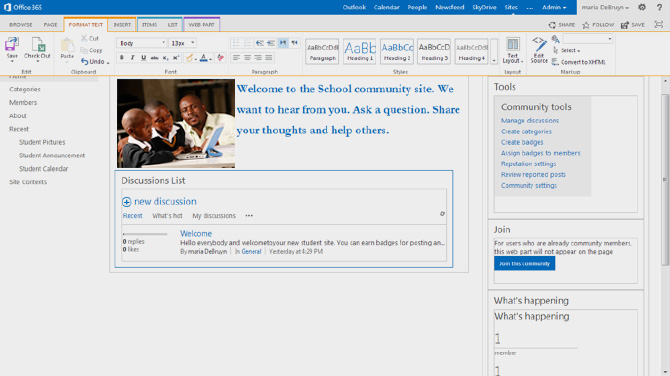
- A toolbar runs along the top of the screen with editing functions. Mrs de Bruyn sees that she can change the way the text on the page looks by using different fonts, colours and styles. She chooses a different style for the header text on the page and then clicks on the Insert tab at the top of the page.
- The changes take effect and her screen now looks like this:

- The new toolbar gives her the options to upload a table, video or audio material, links and pictures. She selects Picture and is given options for selecting the source of her picture. She has an image of the school on her computer and so clicks on this option.
- She locates her image and clicks OK. The image now loads to her page. She can change the size by using the functions in the image toolbar and decides to reduce the size of her image.
- If she selects different parts of her page by clicking on them, new toolbar functions and tabs appear to help her change things around. Her screen now looks like this:
- Once she is happy with the changes, she clicks on Save at the top right side of her page. This returns her to the site home page.
- Knowing her students as she does, Mrs de Bruyn is sure they will have plenty of suggestions on how to improve the site by adding more features and making further changes.
- She now posts an update on the site Newsfeed reminding students to follow the site for all news items and changes.
SharePoint Guides - Further Reading
Setting up Sharepoint» Setup guide for SharePoint for Education
» Scenario: Setting up a public website
» Scenario: Creating a subsite
Download the full guide
Using SharePoint in education
» Setting up a personal SharePoint site
» Scenario: Using the Survey App
» Scenario: Using a team site in SharePoint
» Scenario: Setting up a student site
» Scenario: Class projects & assignment submission
Download the full guide