Office 365 for Education
Setting up a personal site in SharePoint
You will need to read the Setup guide for SharePoint for Education before you can start on this one.
Your SharePoint personal site is your online space.
- You can use it as your own private online office space and virtual ‘assistant’ for storing important documents, contacts and links.
- It can be used for setting up and planning your own workflow across the year and for your own calendar and reminders.
- As with all SharePoint site collections, you can invite others to selected parts of your personal site.
- You can also add apps if you choose.
As you use SharePoint, you will become a more confident user and be able to try out some of the more advanced functions and features. You will find a complete list of these by going to Settings, the wheel-shaped icon at the top right of the screen next to your name. This guide, like the other SharePoint guides, is just to get you set up and working.
- You access your personal site by clicking on your name at the top right of your Office 365 homepage.
- Select About me from the options that appear.
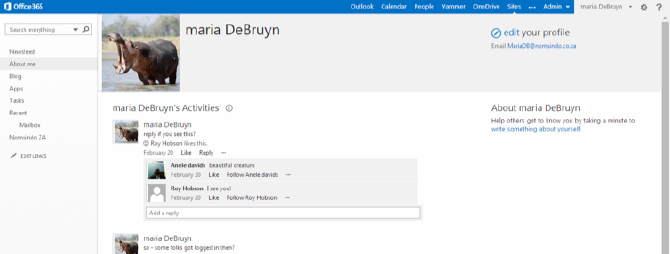
- The screen will look similar to this, although at first there will be no activity on your page:

- You can see some posts that this user has made to Newsfeed (In future connecting with others will be via Yammer, with Newsfeed being for information about any sites you follow). All these appear as an activity stream on your personal page. Updates to SharePoint sites you start to follow will also appear here.
- This is your own personal SharePoint site. You might use this page to share information about yourself with colleagues, communicate by message and share your thoughts and writings on a blog with that same group of colleagues.
- There are several useful functions that you can use on your personal site. You can invite other users to view some of your features, including your blog and tasks.
- Explore the commands on the left toolbar. The first one is your Newsfeed. This is your communication and connection tool on your personal site page where you get update notices about other SharePoint sites you are following.
- Newsfeed keeps you in touch with what else is going on in your institution’s SharePoint sites, provided you have chosen to follow them.
- Following other users will soon be done through Yammer, which has even more powerful sharing functions. Yammer is covered in another of these guides.
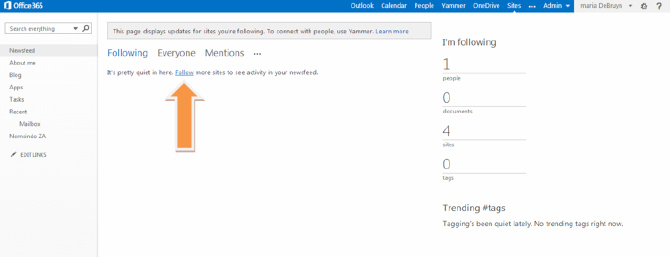
- Clicking follow (indicated by the arrow in the below screenshot) on the next screen brings up a list of suggested SharePoint sites to follow from your institution’s Office 365 platform.
- The next function on the left menu isAbout me,which is where you add your personal details. This is the page you first reach when accessing your personal site. Don’t forget to use a nice photo!
Now let’s look at the rest of the features in the left menu of your SharePoint personal site in a little more detail.
1. Setting up a blog
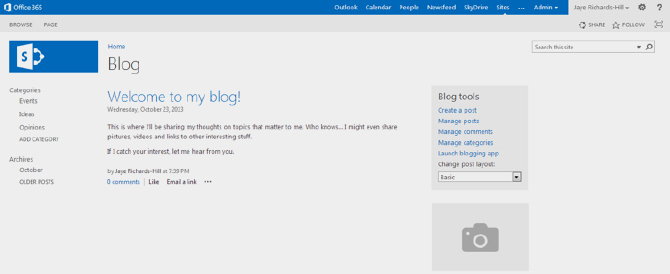
- Blog is where you can construct your own blog site. Using the share command at the top right corner of the screen, you can share your blog with everyone in your institution’s Office 365 platform or make it by invitation only.
- The Blog tools menu on the right of the screen allows you to create and manage blog posts, allow comments from other users and categorise your posts.
- You can also add a picture of yourself underneath this menu.
- The menu on the left of the screen gives you further options for categorising the posts on your blog.
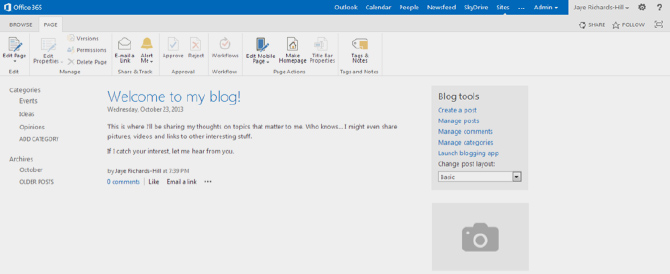
- Clicking on the Page command at the top left of the screen brings up a toolbar containing functions that will help you when writing blog posts. It should look like this:
- Take some time to explore the different commands and options for your blog. You will gradually become more familiar and confident, and later use more of the different functions. Writing blog posts is a great way to share your thoughts and views so remember to let others know when you publish a blog post by posting an update and a link to your post on Yammer.
- Now go back to your personal site home page. You can do this by using the back arrow on your device or by selecting About me from the drop-down menu under your name.
- You will see four other functions on the menu down the left of your screen - Apps, Tasks, Recent and Edit Links.
2. Working with Apps
- Your personal site lets you add apps just like every other SharePoint site. This is a good place to become familiar with apps and practise using their features. You can always delete them if you don’t want to keep them, but take some time to explore all of the many different appsand their functions and features.
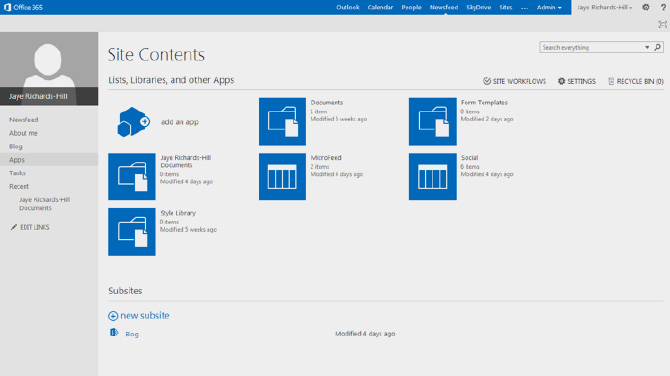
- Click on Apps. This brings up a screen where you can browse and select the apps you would like on your personal page. The screen will look like this:
- You can find out more about the apps by hovering over each app icon and clicking on the three small dots that appear on the top right of the app window. For example, if you try hovering over the Documents app it will look like this:
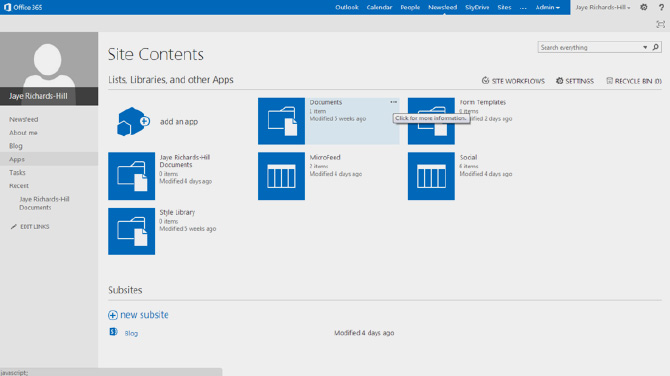
- Clicking on the dots reveals an information box that explains a little more about the app. Don’t worry if you don’t understand what some of the apps are for. You will become more familiar with them after using Office 365 for a while. Other guides will explain how to use particular apps in more detail.
- When you select an app, it will appear in the menu on the left of your screen under the photo box. You can see Documents has been added in the above screenshot. Opening this app will enable you to store documents here.
3. Tasks
- This is an area where you can make your ‘to do’ list and track your progress.
- You can add a new task to this page by clicking on the +add new task command and following the instructions on your screen.
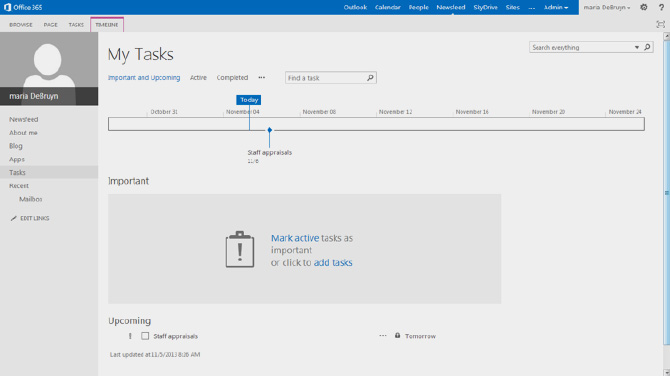
- There are three screen view options listed under the My Tasks heading - Important and Upcoming, Active and Completed. Clicking on any of these reveals a timeline.
- The tasks are displayed on this simple timelineat the top of the page. It looks like this:
- At the top left of the screen you will see the three commands Browse, Page and Tasks. Clicking on each of these will reveal a toolbar with further options for your tasks page.
- Open these toolbars and have a look at some of the things you can do. Hover your cursor over each icon to reveal a short explanation of its functions.
- It is possible to sync your tasks in Outlook (the mail and communications part of Office 365) so that you can make changes to this part of your site on other devices (including your cell phone), and these changes will also appear on your main computer.
Using Tasks is a very good way to plan your workflow for the coming academic session. It enables you to see at a glance how your work is spread out on the timeline. It is also a useful tool for students to use to plan their work and revision at exam time.
4. Recent
- This is the area that shows recent additions to your site. It is a useful reminder of the latest apps you have downloaded to your site.
- It is particularly useful if an app you have selected takes some time to be created. When the app is completed you will see it appear in your recent list.
5. Edit Links
- This is where you can add new weblinks or edit existing ones. You could also add a Links app to collect all of
your links. - You can also drag and drop links into this space.
- Your new links will be displayed above the Edit Links command.
As you become more confident in using SharePoint, you will discover more advanced functions that further enhance your personal site, such as the Mailbox app. This lets you set up a separate email address using Exchange for a specific project. Email involving this project can be collected in the mailbox and viewed by project team members, and forms a complete communications record. The people in the team simply include this mailbox address among the recipients on any mail concerning the project.
You might also wish to set up your own personal Calendar, which you can share with others if necessary.
This guide has just given you a brief tour of some of the basic functions. Log into your institution’s Office 365 platform and try setting up your own SharePoint personal site using this guide as a reference.
SharePoint Guides - Further Reading
Setting up Sharepoint» Setup guide for SharePoint for Education
» Scenario: Setting up a public website
» Scenario: Creating a subsite
Download the full guide
Using SharePoint in education
» Setting up a personal SharePoint site
» Scenario: Using the Survey App
» Scenario: Using a team site in SharePoint
» Scenario: Setting up a student site
» Scenario: Class projects & assignment submission
Download the full guide