Office 365 for Education
User Scenario:
Using SharePoint and Office 365 for class projects and returning/marking assignments
Office 365 and SharePoint have some great features for class project sites that allow teachers and students to share resources and assignment deadlines, set tasks, maintain common calendars and enable the submission, grading and return of assignments. This scenario shows a very simple way in which one teacher might use SharePoint for a class project site and how one of his students uses mobile apps and OneDrive* to help with her assignment work.
*Formerly known as SkyDrive.
Sibusiso Morena is a science teacher who has just received his Office 365 login details. After logging in for the first time and changing his password, he is keen to try and put some of his training into action. He decides to set up a team site for his Grade Nine chemistry class term project.
- He clicks on Sites on the top right of his screen. This brings up his home page, which looks like this:
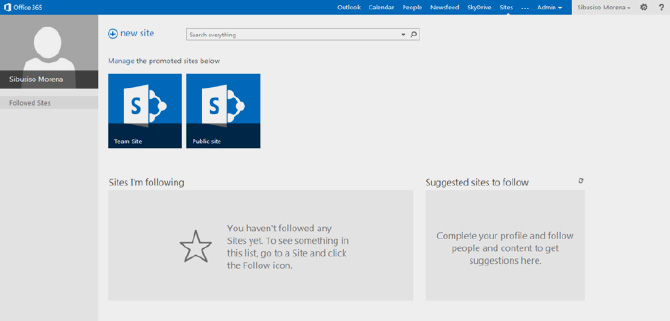
- His Sites view is pretty bare!
- Clicking on the OneDrive tab at the top of the screen gives him access to the Office Online versions of his Office productivity tools (Word Online, PowerPoint Online, Excel Online and OneNote Online) and his own private resource storage area.
- He also recognises Outlook and Calendar as his email and task scheduling tools, and Newsfeed as his personal homepage where all his messages and changes to documents and other SharePoint sites that he is following appear in an activity stream.
- His institution has not set a specific hierarchy for sites, so Sibusiso decides not to make his Chemistry project site a subsite of any other site collection. All staff members in his institution have administrator permissions so he is able to do this.
- Sibusiso looks at the two suggestions for SharePoint sites but decides to click on +New Site to build his Grade 9 Chemistry site collection. He clicks on the link and the new site template loads on his screen. He gives his new project site a name and clicks Create. His site is then created by SharePoint and his screen looks like this...
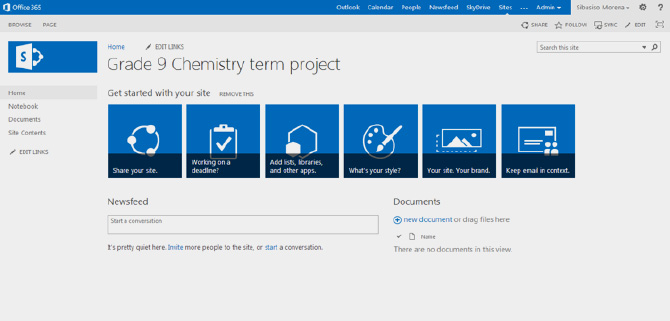
- The blue boxes contain suggestions for the contents. Sibusiso works though them for ideas on how to construct
his site. - By following the instructions after clicking on the blue boxes, he adds a logo and changes the appearance of his site by using a different design template.
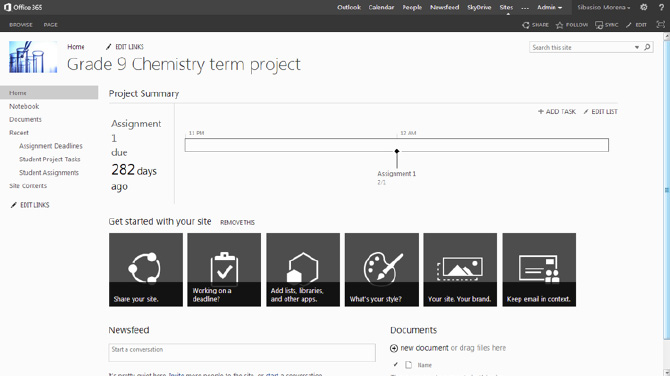
- Next, he adds some apps that he and his students will use during their project. He adds a calendar, a document store for student assignment submissions, and a tasks planner. His site now looks like this:
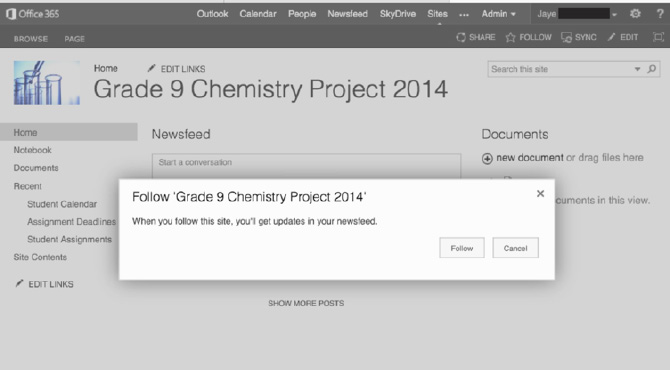
- Sibusiso now adds his students to the team site so that they can use all of the functions and tools. He knows that when they follow the site they will be able to see the tasks and calendar entries and he will be able to send messages to their Newsfeeds.
- He clicks in the Share your site box and searches for his grade 9 students, adding them as he works his way through his class list. Typing just a few letters from their names brings up their details.
- Once he has all the names in the box, he checks through his list and adds them to his site, as well as typing a personal email message to each of them to let them know they have been invited to the Chemistry project site.
- He then clicks on Remove this above the suggestion boxes so that they disappear.
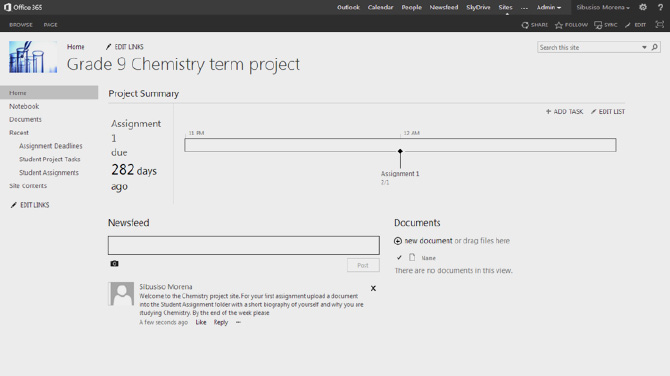
- Sibusiso types a welcome message into the Newsfeed box, which also sets his students a task. In addition, he knows his message will now appear in their Outlook email box when they next log into Office 365.
- The site homepage now looks like this:
- He will use the Student Assignment Document Store to grade the completed assignments and give feedback to his students on how they could improve their work.
- Sibusiso sets other assignment and task details in the Deadlines and Tasks apps he has placed in the site. These appear in the menu on the left of the page.
- Meanwhile Jayne, one of the Grade 9 Chemistry students, is browsing on her tablet while s on the train going home after school and notices an email in her Outlook Web App mailbox.

- She reads the message from her Chemistry teacher, Mr Morena, and clicks on the link to the project site which she starts to follow. She notices that there is an assignment to complete by the end of the week.
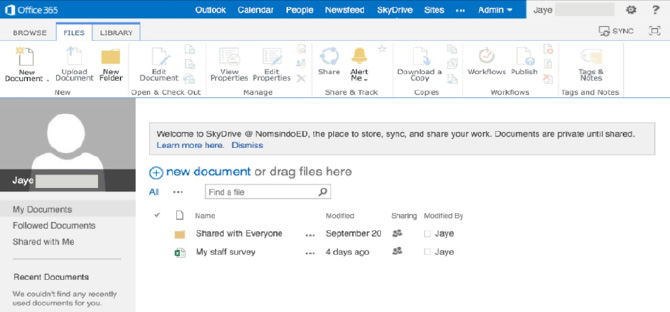
- She goes to the OneDrive tab at the top of her Office 365 screen and clicks on it. She then clicks on the File tab at the top of the screen:
- She clicks on New Document on this toolbar and types in a name when prompted (Chemistry Assignment – Jayne). This opens up a blank document in the Word Web App.
- Jayne types up her assignment which is a brief biography of herself and why she wants to study Chemistry.
- Her train reaches her stop and so she saves the document to OneDrive and closes down her tablet. She will finish the assignment when she gets home.
- After she has had something to eat and drink, Jayne sits down with her laptop to do her homework. She logs into Office 365 and opens OneDrive to recover her document. She finishes working on it when it has downloaded to her laptop.
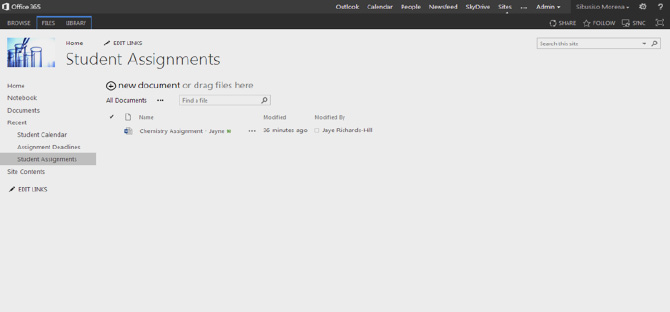
- Jayne goes to the Chemistry project site and clicks on Student Assignments from the left menu. She drags the finished document from the folder on her laptop into the area on the project site screen that says ‘or drag and
drop here’. - Her assignment is uploaded to the Student Assignment Document Store. She can also share it with her teacher Mr Morena directly from her OneDrive in Office 365 by selecting Share and typing Mr Morena’s name into the box on her screen and completing the send email box to notify him.
- Sibusiso is working at home in Office 365. He checks the Student Assignment document store and notices that there has been an upload. He opens it and sees that it is from one of his students, Jayne.
- He clicks the tick that appears to the left of Jayne’s document when he hovers over it with his cursor. This highlights the document title.
- He then clicks Check Out from the toolbar functions that are revealed when he clicks on the Edit tab at the top of his screen. This stops anyone else from accessing the document while he reviews and grades it.
- When he is finished with Jayne’s assignment, he selects Check In. In the changes box, he types assignment graded. Jayne is now able to download her graded assignment and read the feedback.
- Sibusiso records this assignment activity on the Excel spreadsheet that he uses to keep student records of achievement for each of his classes. He keeps this spreadsheet in his own OneDrive.
- Jayne uploads the graded assignment to a OneNote workbook she uses as her ePortfolio record of achievement and for storing notes.
It is often very useful for students to be able to see one another’s graded assignments so that they can learn from each other and from the teacher feedback each receives.
Alternative and more private ways of returning assignments would be to use sharing with OneDrive, email or OneNote between teacher and student. The advantage of doing through a class workspace is that all assignments for the particular subject are managed in one specific place.
SharePoint Guides - Further Reading
Setting up Sharepoint» Setup guide for SharePoint for Education
» Scenario: Setting up a public website
» Scenario: Creating a subsite
Download the full guide
Using SharePoint in education
» Setting up a personal SharePoint site
» Scenario: Using the Survey App
» Scenario: Using a team site in SharePoint
» Scenario: Setting up a student site
» Scenario: Class projects & assignment submission
Download the full guide