Office 365 for Education
Using Office Online through SharePoint
The previous guides in this series have introduced you to basic provisioning and setup of Office 365 and to using SharePoint for administration, learning and teaching in your own education institution. Hopefully, you are now a bit more confident and have spent some time exploring your new Office 365 for Education platform. You should now be able to do the following:
- Add new users to Office 365
- Assign different levels of licence and permissions to your users
- Set up login and password details for your users, and reset if necessary
- Set up SharePoint sites for different uses (admin, community, teaching subjects and projects, and personal sites)
- Change the appearance of your sites and edit different parts
- Set up a simple website and make it visible to the public
- Follow other groups, people and documents in your NewsFeed
- Know how to share documents and your calendars
- Select and set up apps for SharePoint sites
- Set up Team sites and assign tasks to team members using SharePoint apps
This next guide will take you through some of the other features of Office 365 that you will use either on their own or within SharePoint. Communication and collaboration are at the heart of everything you do in Office 365, and all of its features are designed to work together to help you do existing tasks better and to discover new things that will enhance learning and teaching in your institution.
Using Office Online*
You will probably be quite familiar with the Office applications that are installed on your PC or Laptop (Word, Excel, PowerPoint and OneNote). Office Online in Office 365 consists of lighter versions of these with fewer of the functions, but they do give you access to everything you will need to work. And as they are online, you are able to:
- Work on your Office Word documents, Excel spreadsheets, PowerPoint presentations and OneNote workbooks anywhere you have internet access
- Sync all changes to existing documents with all your devices and to your laptop or desktop machine
- Share Office files with other Office 365 users
- Work collaboratively to review and edit the same files together
- Create new files and sync them to your desktop machine for the more powerful editing tools in the version of Office you have installed
- Get assistance from the Help tab with any difficulties you might encounter
- Work easily others because you can send links to files like PowerPoint, Word and OneNote instead of sending file attachments. That saves on email storage and prevents you from needing to reconcile multiple versions of the same document manually.
One of the advantages of using Office 365 for Education is that once your domain has been set up there is hardly anything you need to do because Microsoft takes care of all the software maintenance and operating updates, freeing you to concentrate on your work.
You can access Office Online on your Office 365 platform either in any SharePoint site or through OneDrive**. This guide will help you understand more about accessing the apps through your SharePoint site collections.
Accessing Office Online through SharePoint
- Go to your SharePoint site homepage by clicking on the Sites tab at the top of your Office 365 screen.
- You will see the Documents heading on the right of the screen.
- Click on +new document.
- A drop-down menu will appear, listing the Office Online options. It will look like this:

- Select the file type you want to create and click.
- Select Word Document, for example, and a window will appear that asks you to give your new file a name.
- Enter the document title and click OK.
- Your new blank document will then load. You should recognise most of the functions in the tool bar ribbon running across the top of the page. It will look like this:
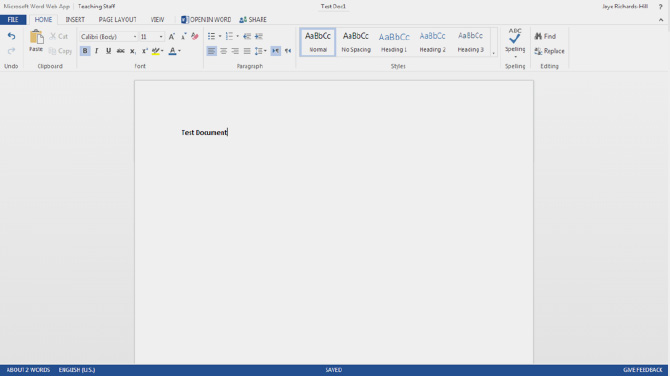
- If you want to use the more powerful editing functions available on your desktop machine or laptop, click on Open in Word in the tabs above the ribbon. Your document will then open up in your installed Office Word product.
- You can now work on your file using all of the tools available to you from your installed version of Office Word. When you need to save your document, click on the File tab at the top left of the screen. Your screen will now look like this:
- Click on Save As halfway down the menu on the left side of the screen.
- You will then be given several options for saving your document. The screen will look like this:
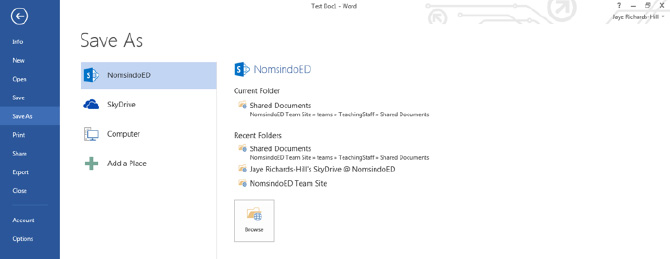
- The first option is to save to your SharePoint sites. Select the location and your updated file will save to your selected site.
- You also have the option to save to other locations, including your computer and your Office 365 OneDrive.
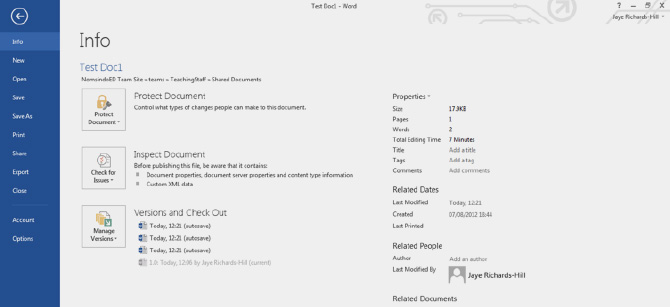
Have a look at the other options on the menu running down the left side of the screen. Take some time to explore these functions by clicking on their tabs.
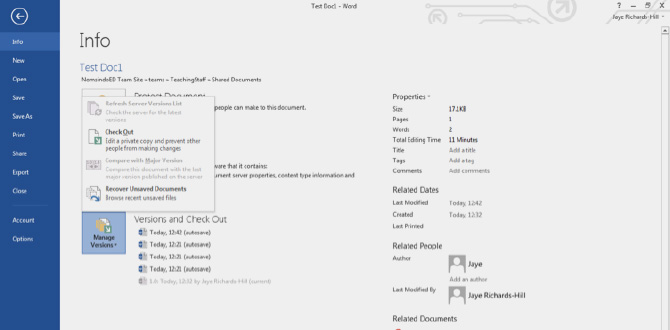
- The first command is the Info tab, which allows you to change some of the sharing functions. It gives you information about edits to your document and who has made the edits.
- You can make the document read only, or by clicking on Manage Versions you can Check Out the document to prevent others who you have shared it with from making further edits. This is what the screen will look like:
- Clicking on the arrow at the very top left of your screen will take you back to your Word document in the version installed on your desktop or laptop machine.
Opening other file types such as PowerPoint and Excel in Office Online gives you access to similar ‘lite’ versions of your desktop or laptop-installed Office products. You can flip between these two versions of each file just as this guide has done with an Office Word file.
- Office Online is great when you are away from your desktop and want to work on files you have within Office 365 (in SharePoint or OneDrive).
- You can see how useful they will be when you want to work with colleagues on the same file from different locations.
- When a file is shared or available to everyone in a SharePoint site, then colleagues can work on the file in different locations and at different times (unless the file is checked out) with changes made being immediately visible to others.
- Office Online tells you who is working on a file at the same time as you are. You can see their changes taking place in real time and their names appear on your screen so that you know who is working at the same time as you.
- When you click on Save the other users working on the file are notified that the file has been updated.
- When other users save the file they will see your changes, and their changes are available for you to see. By refreshing the file every time you save it, you control when you see the updates. This allows you to work with minimal interruption, even though others are working on the file with you.
- You can also work at the same time as other users in Excel, PowerPoint and OneNote in exactly the same way as with Word.
- Post details of the changes to team documents on Newsfeed to keep team members up to date or follow documents and files so that the changes appear automatically in your Newsfeed.
Now spend some time working through the Office Online versions of PowerPoint, Excel and OneNote. While SharePoint team sites are great for storing files for all of your team to be able to work on, you might want to use OneDrive for individual files created with Office Online.
*Formerly known as Office Web Apps.
**Formerly known as SkyDrive.
Office Online and OneDrive - Further Reading
» Using Office Online through SharePoint» Using Office Online through OneDrive
» Scenario: Using Office Online for assessment
» Scenario: Using OneNote for student ePortfolios
» Scenario: Using an Excel Online survey
Download the full guide