Office 365 for Education
Adding bulk lists of users using a .csv file.
- From your Office 365 dashboard, select users and groups from the menu on the left side of the screen.
- This will bring up your list of active users.
- Go to the four icons above Display name and click on the second icon from the left.
- This gives you the option to select your .csv file for uploading. If you don’t have one, you now have the option to download a blank copy for completion.
- The screen will look like this
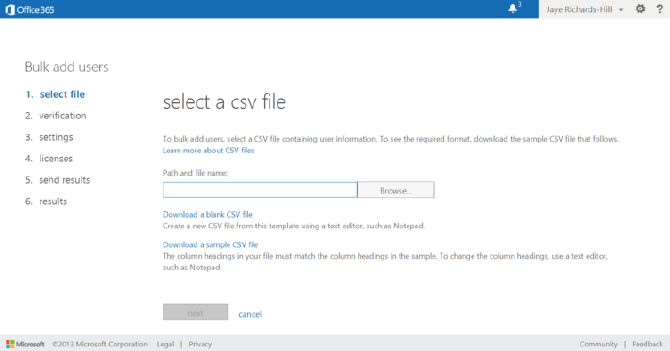
- Your .csv file is an Excel spreadsheet that must be in a particular format in order to be imported successfully.
- You can download a sample spreadsheet and a template (by clicking on the links on this page) into which you can import data from your own educational establishment records.
- You should only use this option if you are familiar with .csv files and spreadsheets.
- Click on Browse and select your .csv file. Then click next to upload the file.
- Follow the step-by-step instructions on the screen. They are similar to when you added users individually.
- You will assign permissions and licences and generate login details in exactly the same way as before except that this method is quicker if you have large numbers of users to add.
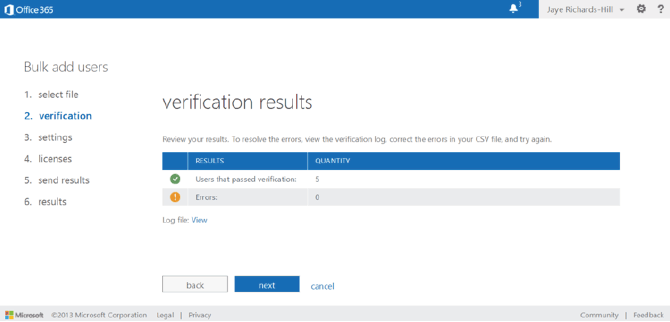
- If any errors appear, go back to your .csv file and correct the formatting then try to upload it again. If there are no errors, click on next. You will then see this screen:
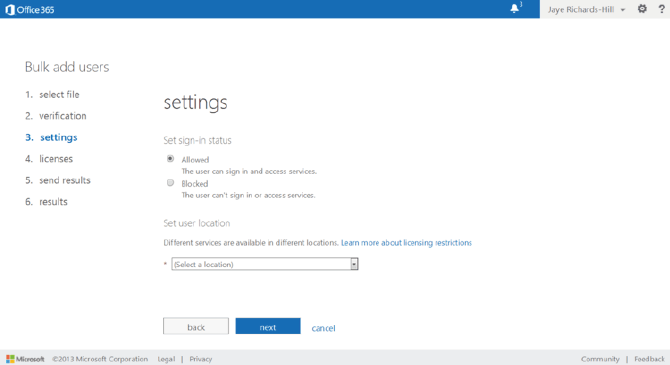
- Provided you want your new users to be able to access Office 365 immediately, select Allowed.
- Select their location from the drop-down menu.
- Click on next.
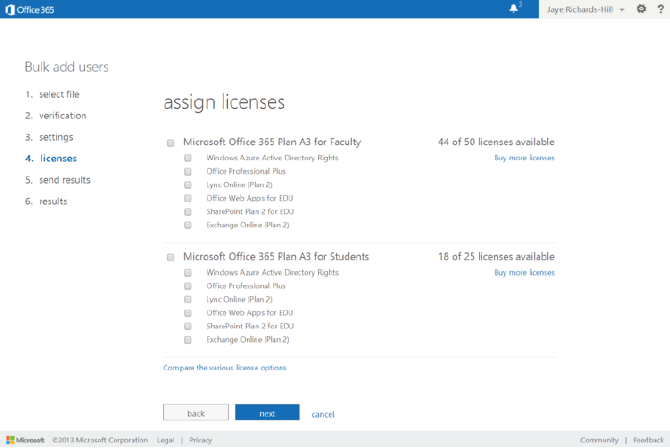
- When you see the screen above, choose which licence and services to assign to your new users. This will be either staff (faculty) or students. You can also choose individual services.
- When you have done this, click on next.
- You should then see this screen:
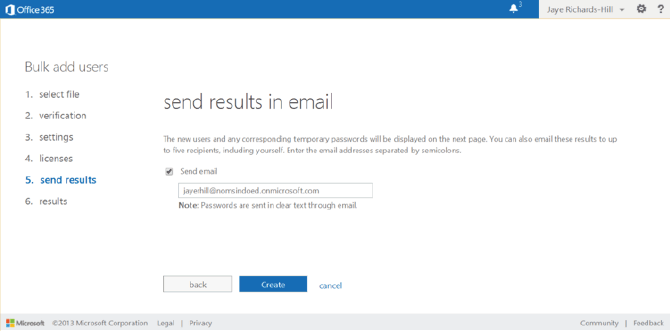
- Tick the Send email box and the login details of your new users will be sent to your email address.
- Click Create to set up your new users.
- You can then return to the users and groups page where you will see your new users appear in the Display name list.
Once you have set up your site and added users, you are now ready to start using Office 365 functions across your educational establishment.
Separate guides will show you how to use all of the different tools and functions, and enable you to help your educational establishment staff and students get used to using Office 365 as well.
Remember if you get stuck, you can always return to your Office 365 dashboard and start again!
Provisioning Guide - Further Reading
» Getting started» Signing up for Office 365
» Adding users (individually)
» Adding users (bulk users)
» Version upgrade
» Technical stuff
» Glossary
Download the full guide