Office 365 for Education
Adding users to your site individually
- Your users are your educational establishment community. This normally means teachers, lecturers and students as well as administration staff, but who you add is entirely up to you and your educational establishment.
- You might want to add parents and carers, or other people who work in the educational establishment such as religious leaders and medical team members.
- Once you have added your users, you will send them an email with their Office 365 login details and temporary passwords. They can then log in, reset their passwords and start to use all the features of the Office 365 platform.
- Go to your dashboard page and click on users and groups in the left menu. This will take you to the area where you will begin to add your users. Your screen should look like this:
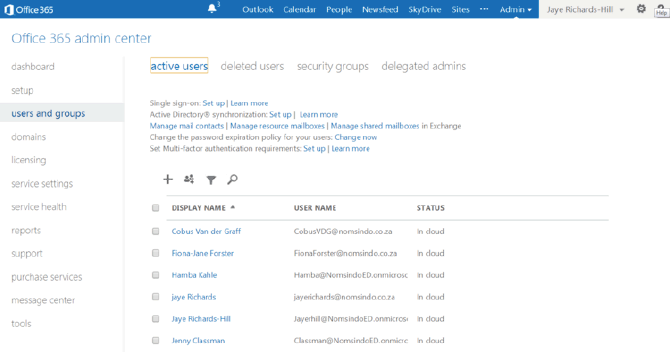
- Have a look around the screen. You will probably understand the functions of many of the buttons, but don’t worry about those you do not as you will probably not use many of them. Others will become more familiar as you become a more advanced user in time.
- Your own screen will be blank apart from your name, but you will notice in the screenshot above that some users have already been added to our test school.
- To add a new user, click on the + symbol, located above Display Name.
- Adding user details is simply a matter of typing their information into the boxes. Your screen will look like this:
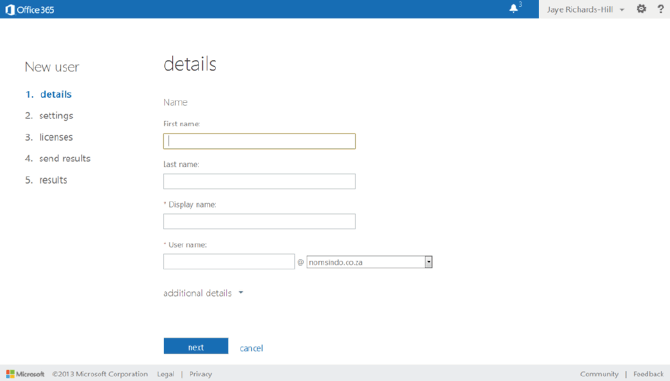
- If you wish, you can complete the additional details section by opening the drop-down menu underneath the details section.
- This is particularly useful for recording information about members of staff.
- When you choose a user name for the new user, a login user name is generated.
- Click on next. The next page allows you to set the permissions and enter the location of each user. It will look like this:
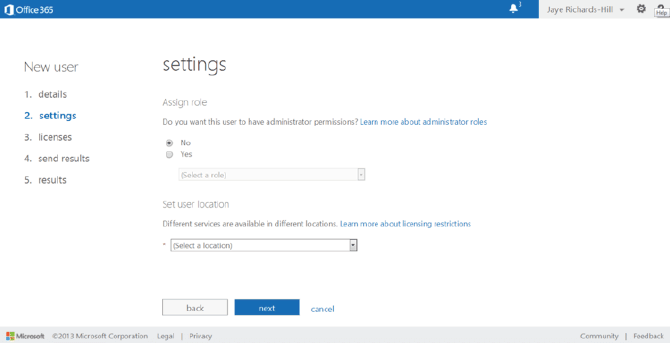
- You now need to decide which permissions to assign to your new user.
- They require administration permissions if they will need to be able to reset lost passwords and create their own groups to invite other users to join.
- Think carefully about the role each user has in your educational establishment.
- Teachers or lecturers might need to be able to set up their own workspaces and groups, and reset student passwords.
- You might therefore wish to assign administration permission to all staff. When you select Yes you will be able to choose the level of administration rights from the drop-down menu below.
- Important - you need to be an administrator in order to be able to set up SharePoint sites.
- When you click on the drop-down menu, your screen will look like this:
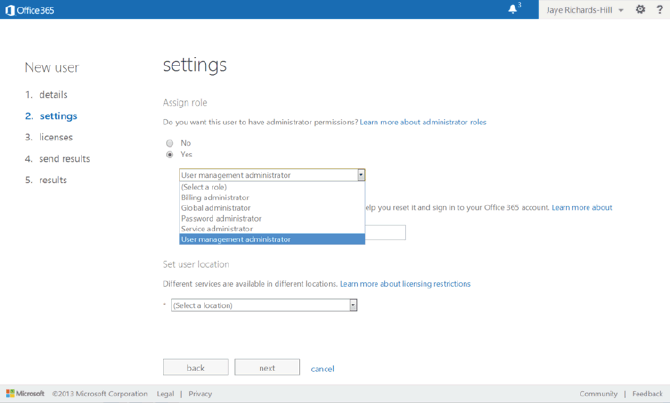
- You can learn more about each admin role by clicking the link above the choice box. This explains what each of the five roles means.
- In practice, your staff will probably need to have User management administrator permissions with one or two people in your educational establishment having the top level Global administrator role.
- You can reassign permissions whenever you need to.
- You also have the option to set an external email address for password recovery for administrators here. This should be their own email address.
- Select the location of the new user and click on next.
- You will then be taken to the next page where you assign a licence to the new user. The options are Faculty (staff) or Student.
- You can remove access to certain services by unchecking the boxes on this page. For example, you might decide that your students will not be using Lync (the video conferencing tool).
- The trial version limits you to 25 of each licence. This limitation will disappear once your domain verification checks have been completed by Office 365 and you have upgraded your plan from the trial to the full version. Once you have assigned a licence to the new user, click on next to be taken to the final page in the process of setting up new users.
- You can now set up an option to email the new user’s login details. The page will look like this:
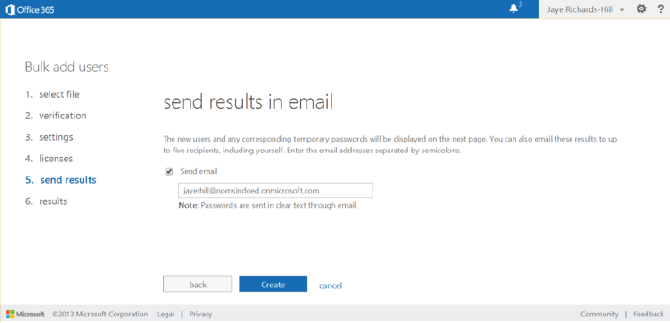
- This is a useful feature that can save you from needing to print and manually distribute new user login details.
- When you have done this, click Create and your new user login details will be displayed on the next page like this:
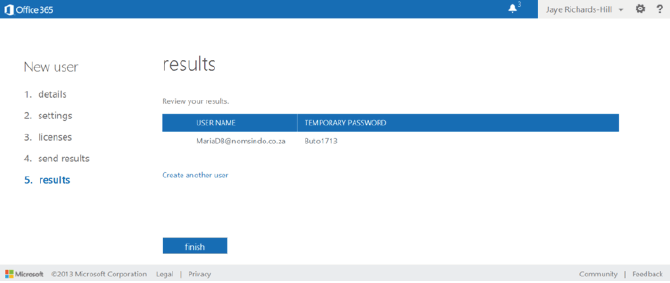
- You can now carry on and create more user accounts, or select finish and return to your Office 365 users and groups page where a list of active user accounts will be displayed.
- Now select the funnel icon (above Display name) to filter this view to only certain users.
- Open the drop-down menu to view the different user categories available. It will look like this:
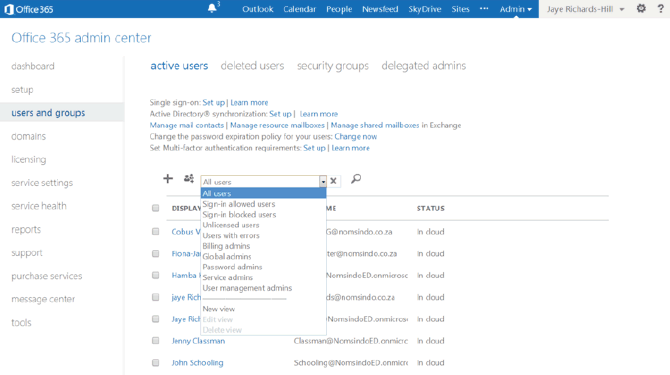
- There is also a Search icon that allows you to search quickly for individual users. This is useful as all of your active users will be displayed in your users list.
Provisioning Guide - Further Reading
» Getting started» Signing up for Office 365
» Adding users (individually)
» Adding users (bulk users)
» Version upgrade
» Technical stuff
» Glossary
Download the full guide