| |
Illustration
Ms. Ndlovu is an engineer who builds lots of different buildings. You have already helped Ms. Ndlovu with one of the first steps of building a new building—the floor plan. But what else might she need to show people what the new building will look like?
 |
Plan It |
| |
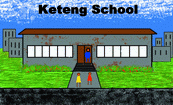
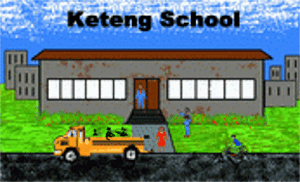
Complete an illustration or picture that shows what the front of the building will look like from the outside. Look at the following example:

Think about the following questions, and discuss your ideas with your
partner. You might want to write your ideas on a sheet of paper and to refer to your completed floor plan for guidance. You might also want to draw a rough sketch of what you want your illustration to look like.
- Based on the completed floor plan, how wide and tall would the front of the building be? Where would the doors, windows, steps, and other features in the floor plan be located on the outside of the building?
- Where would the building be built? What might you see in the background behind the building? What would you see in the foreground in front of the building?
- What part of your illustration might you do first? Which parts might you work on last?
Remember to use the rubric as a guide as you plan, do, review, and share.
For help on how to do certain skills, look at the following groups in the Help Guide:
- Graphics Group 2: Painting Shapes and Lines
- Graphics Group 3: Making Changes to Pictures and Photos in the Graphics Paint Software (NOTE: This group name will change depending on the Help Guide version being used.)
|
| |
|
 |
Do It |
| |
- Start the graphics paint software and open a new, blank document. If you have not yet opened your completed floor plan, open the file now.
- Make the canvas size about the same size as a sheet of paper printed sideways, or about 25 centimeters wide and 18 centimeters tall.
- Start by using the different tools to paint the background, or anything that you want to put behind the building (such as the sky, other buildings, trees, and so on).
- Make sure you save your work often, and if you make a mistake, use the Undo feature, erase the mistake, or paint over the top of it. (NOTE: You might want to save your work and open a new canvas to experiment with the painting techniques. Then, close the experiment canvas without saving it, and use the technique you just practiced in your illustration.)
- After you have finished painting the background, use the shape and line tools to paint the basic outline of your building.
- Next, use the shape and line tools to add details such as doors, windows, and other elements. Remember to refer to your floor plan to figure out where in your illustration you want to put the details.
- Once the building's basic outline and the detail shapes have been added, use the brush tools to add colour.
- After the building is complete, paint the foreground, or anything that you would like to put in front of the building (such as plants, a street, a bus, or even people). Select and copy any foreground objects you might want more than one of, and modify them as needed.
- Add the building's name to the illustration. To keep from covering up too much of the illustration, you might want to make the text box transparent, or see-through. Then, move it over an area where the words will be easy to read.
- Save your finished illustration for use in a print document.

|
| |
|
 |
Review It |
| |
Look over your illustration. Make sure it has the following elements:
- Painting of the building based on your completed floor plan
- Foreground and background that help show what the building might look like with other buildings, plants, people, and cars around it
- Painting canvas that is about the size of a sheet of paper printed
sideways
If any elements are missing, add them now. If you want, make other changes, as well. Remember to save your work when you are finished.
|
| |
|
 |
Share It |
| |
Be prepared to discuss your answers to the following questions:
- Which tool did you find the most useful? Why?
- What are some of the ways you fixed any mistakes you made? Which did you use the most? Why?
- What parts of your illustration did you do first? Which did you do last? Based on what you know now, would you go in a different order? Why?
- What other types of illustrations might you complete on the computer?
|
|


