Module 9
Applying Multimedia
Module 9
Topic Introduction
As a teacher, you must continually introduce new content to your
learners. How do you typically introduce a subject or content area in your classroom? Is it easy for you to hold the learners' attention? How might multimedia improve learning? For what classroom
content might you use multimedia to teach?
![]() Plan It
Plan It
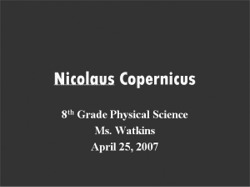
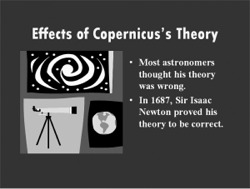
Create an instructional lesson presentation that uses multimedia to teach classroom content. Look at the following example:
 |
 |
 |
 |
 |
Topic Introduction Presentation Example
Think about the following questions, and if working with a partner, discuss your ideas. Writing your ideas on a sheet of paper or drawing rough sketches of your slides might be helpful.
- For what classroom content might you use multimedia technology to teach? How might multimedia technology help learners learn and
understand the content better? - What specific ideas, skills, or information do you want to teach? How might you organize the information onto different slides?
- Could you use pictures, tables, charts, or sound to help learners
understand the information better? - How might you summarize or conclude the presentation?
- What multimedia effects might you include in your presentation?
For help on how to do certain tasks, look at the following groups in the
Help Guide:
- Multimedia Group 3: Building Presentations
- Multimedia Group 4: Making Slides Look Good
- Multimedia Group 5: Adding Words
- Multimedia Group 6: Adding Pictures and Artistic Effects
- Multimedia Group 8: Adding Animation and Special Effects
![]() Do It
Do It
- Start the multimedia software, and open new, blank presentation.
- Insert a Title slide. If necessary, switch to Normal View.
- Click the title text box at the top of the slide. Type the name of the
specific classroom content that you plan to teach. - Click the subtitle text box at the bottom of the slide. Type any other
information that you would like to include on the title slide, such as the name of the actual course or the general content area, your name as the teacher, and the date of the presentation. - To help all of the slides in your presentation look the same, open and view the Slide Master. (For help, see Multimedia Skill 5.14: To use the Slide Master to change the look of the words in all slides.)
- Change the look of the words in both the top title text box and the large middle text box.
- Return to Normal View. Notice that the changes you made on the Slide Master can now be seen on the title slide.
- Insert a new slide. Be certain to pick the best slide layout for the
information that you want to include. - Type the information that you want to include in the slide. Feel free to delete or add text boxes as needed.
- Insert any other information that might help learners better understand the content. For example, you might insert a clip art picture or a picture that you download and save from the Internet. You might also add a table of data or a chart. You can even add a sound or video file.
- Repeat Steps 8–10 to create the remaining slides of your instructional presentation. Be certain to end the presentation with a slide that
summarizes and concludes the lesson.
- Return to Slide 1, and apply a standard color scheme to change the color of the text and background of all your slides. (Note: If you are using OpenOffice.org Impress*, access the Master Pages in the right Tasks pane and select from the Available for Use color scheme options.) (For help with the color scheme in Microsoft PowerPoint*, refer to Multimedia Skill 4.2: To pick and use a color scheme.)
Challenge: Create a custom color scheme for the slides in your presentation. (Note: If you are using OpenOffice.org Impress, this can be done by accessing the Master Slide and making changes there.)
- To help the presentation flow smoothly from one slide to the next, add transitions between all of the slides. To create a consistent visual look, consider applying the same transition to all slides.
Challenge: After you apply transitions to your slides, you might also add animation effects to the text and pictures. (For help, see Multimedia Skill 8.3: To add animation or movement to an object, or Multimedia Skill 8.4: To add animation effects to words, or to add an animation scheme.) You may need to set the order and timing so they play properly. (For help, see Multimedia Skill 8.13: To set the order and timing on a slide with many special effects.)
- Play your presentation to make sure everything works correctly. Make any necessary changes.
- Save your work as directed.
![]() Review It
Review It
Look over your instructional lesson presentation. Make sure it has the
following elements:
- A title that introduces the content of the instructional lesson
presentation - Individual slides with specific information that teaches the classroom content
- Text that looks the same in all slides, and slide layouts that suit the
content - Transitions, animation, and other multimedia effects that make the
presentation more interesting to viewers
If any elements are missing, add them to the lesson now. You should also make other desired changes. Remember to save your work when you are
finished.
![]() Share It
Share It
Be prepared to discuss your answers to the following questions during
sharing time:
- How might multimedia make your lesson’s content more understood by a wider range of learners?
- For what other classroom content might you use multimedia to teach? For what classroom content might multimedia not be appropriate? Why?
- How does formatting text in the Slide Master make it easy to change the look of the text in all of your slides?
