Module 9
Applying Multimedia
Module 9
Classroom Rules and Expectations
To ensure that all learners have the chance to learn and grow,
teachers need to establish clear classroom rules and expectations. What are some ways to inform learners of the rules and expectations in your own classroom? One way is to create an informative and
entertaining multimedia presentation.
![]() Plan It
Plan It
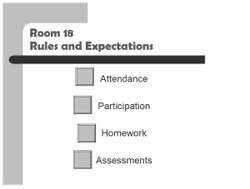
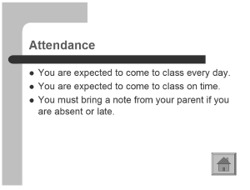
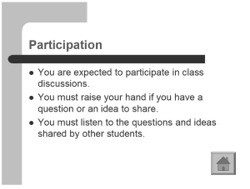
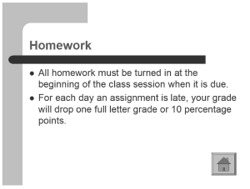
Create a multimedia presentation that explains the rules and expectations in your classroom. Look at the following example:
 |
 |
 |
 |
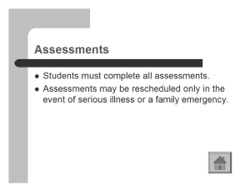 |
Classroom Rules and Expectations Presentation Example
Think about the following questions, and if working with a partner, discuss your ideas. Writing your ideas on a sheet of paper or drawing rough sketches of your slides might be helpful.
- What main types or groups of rules and expectations do you have in your
classroom? Do you have rules about attendance and class participation? Do you have rules about homework assignments and in-class
assessments? - What specific rules or expectations might you have for each main type
or group? - How might you organize the information on different slides?
- What multimedia skills might help you create an interesting and
informative presentation?
For help on how to do certain tasks, look at the following groups in the
Help Guide:
- Multimedia Group 3: Building Presentations
- Multimedia Group 4: Making Slides Look Good
- Multimedia Group 5: Adding Words
- Multimedia Group 6: Adding Pictures and Artistic Effects
- Multimedia Group 8: Adding Animation and Special Effects
![]() Do It
Do It
- Start the multimedia software, and open a new, blank document.
- Insert a slide with space for a title and a bulleted list. If necessary, switch to Normal View.
- Click the title text box at the top of the slide. Type a title for your
classroom rules and expectations presentation.
- Click the text box below the title. Type a word or phrase that names each main type or group of rules that you decided to include during planning. Be certain to start each type or group on a new line.
Challenge: To make your presentation truly multimedia, consider adding sound and music files to your slides. You might also record your voice as you read and explain the information on your slides. (Note: An icon for either a sound file or a music file will appear on your slide.) (For help, see Multimedia Skill 7.1: To add a sound or music file from the Clip Gallery/Organizer and Multimedia Skill 7.2: To add a sound or music file saved on your computer.)
- Insert a new slide with space for a title and a bulleted list.
- Click the title text box at the top of the slide. Type a descriptive word or phrase for the first group or type of rules.
- Click the text box below the title. Type the specific rules or expectations that you decided on for the group during planning.
- Repeat Steps 5–7 to create a slide with a title and a bulleted list for the other main types or groups of rules that you want to include in your presentation. Be sure to refer to the ideas you wrote down during planning.
- Return to Slide 1. Create a button next to the first item in the bulleted list. (Note: In Microsoft PowerPoint you must create an action button. In OpenOffice.org Impress, you must draw a rectangle and customize the
interaction.) Link the button to the second slide in the presentation (the slide with the information about the first item in the bulleted list). (Note: For help, refer to Multimedia Skill 8.9: To add an action button that takes you to a certain slide when clicked.) - Go to Slide 2. Create a button at the bottom of the slide. (Note: If you are using Microsoft PowerPoint, you might want to pick the Home action
button option.) Link the button back to the first slide in the presentation. - Repeat Steps 9 and 10 to create a button for each remaining list item
on Slide 1. Link the button to the correct slide containing the corresponding information. Then on each linked slide, create a button that takes viewers back to the first slide. - To help the presentation flow smoothly from one slide to the next, add transitions between all of the slides. For added visual interest, animate the title text on your slides.
Challenge: Consider creating your a custom animation effect to add to the titles in your slides. (For help, refer to Multimedia Skill 8.5: To make and add your own animation effect.)
- Now that you have finished adding the required information and special effects, pick a design template to change the look of all of your slides. (For help, see Multimedia Skill 4.1: To pick and use a design template.) (Note: If you are using OpenOffice.org Impress, access the Master Pages in the right Tasks pane and select from the Available for Use template options.)
- Play your presentation to make sure everything works correctly. Make any necessary changes.
- Save your work as directed.
![]() Review It
Review It
Look over your classroom rules and expectations presentation. Make sure it has the following elements:
- A slide with a title that introduces the presentation and a list of main types or groups of rules
- Slides with information about specific rules for each main type or group of rules
- Buttons that link each of the list items on the first slide to the correct slide in the presentation, and a button on each content slide that links back to the first slide
- A design template to change the look of all slides in the presentation
- Transitions and animation effects to help the presentation flow smoothly and increase visual interest
If any elements are missing, add them to the presentation now. You should also make other desired changes. Remember to save your work when you are finished.
![]() Share It
Share It
Be prepared to discuss your answers to the following questions during
sharing time:
- What are the benefits of creating and playing a classroom rules and
expectations presentation? - What was the most difficult thing about adding buttons and linking them to the correct slides? How did you manage to complete that task?
- What is the benefit of using a design template to change the look of your slides?
- How might you use buttons or design templates in other multimedia
presentations?
