Module 8
Discovering Multimedia
Exercise 3: Creating Multimedia Documents
Curriculum Overview
At the beginning of the school year, learners and their parents like to know what you will be teaching in your classroom. How might you accomplish this goal? One way is to create a multimedia presentation with text, pictures, and special effects.
![]() Plan It
Plan It
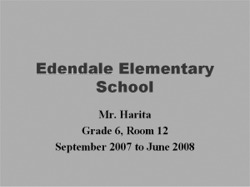
Create a curriculum preview presentation to inform learners and parents of the content you will be teaching in the year ahead. Look at the following
example:
 |
 |
 |
 |
 |
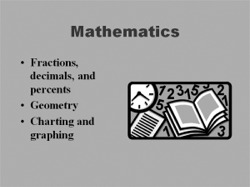
Curriculum Preview Example
Think about the following questions, and if working with a partner, discuss your ideas. Writing your ideas on a sheet of paper or drawing rough sketches of your slides might be helpful.
- At what school do you teach? What grade or class do you teach? What room do you teach in? When does the school year begin and end?
- What are three subjects or content areas that you intend to teach? For each of the subjects, what specific topics or skills will you teach? What related pictures might you add to help make the information clear?
- How might you summarize or conclude the presentation in one or two sentences?
- What are some ways you can make this information interesting to
learners and parents?
For help on how to do certain tasks, look at the following groups in the
Help Guide:
- Multimedia Group 2: Viewing and Working with Slides
- Multimedia Group 3: Building Presentations
- Multimedia Group 4: Making Slides Look Good
- Multimedia Group 5: Adding Words
- Multimedia Group 6: Adding Pictures and Artistic Effects
![]() Do It
Do It
- Start the multimedia software, and open a new, blank presentation.
- Insert a Title slide. If necessary, switch to Normal View.
- Click the title text box at the top of the slide. Type the name of your school. Change the font, size, color, and style of the text.
- Click the subtitle text box at the bottom of the slide. Type your name, your room or grade number, and the beginning and end dates for the school year. Change the font, size, color, and style of the text.
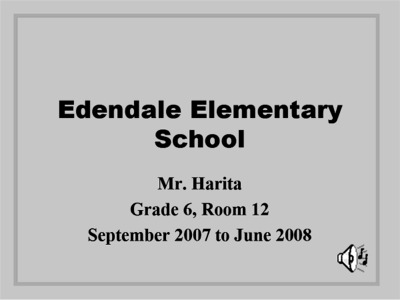
Challenge: Add a border to the title slide by drawing a large rectangle. Remove the fill color so you can see the text. Then, pick the desired line width and color. (See the Slide 1 Challenge Example at the end of this section.)
- Insert a new slide with space for a title, text, and clip art.
- Click the title text box at the top of the slide. Type the name of the first content area or subject that you decided to include during planning. Then, change the font, size, style, and color of the text. To create a consistent visual look, this text should look similar to the presentation title on the first slide.
- Click the text box in the bottom corner of the slide. Replace the text with a bulleted list of content area topics that you might teach in the year ahead. Change the look of the text.
- Click, or double-click if necessary, the picture box in the opposite bottom corner of the slide. Insert a clip art picture that is related to the content area or one of the listed topics. Resize the picture if needed.
- Insert a duplicate slide. Then, repeat Steps 6–8 to complete a slide with the second content area as the title, a list of topics to teach, and a
related picture. - Insert another duplicate slide. Then, repeat Steps 6–8 to complete a slide with the third content area as the title, a list of topics, and an appropriate picture.
- Insert a Title Only slide. In the title text box, type one or two sentences that summarize and conclude the presentation.
- Now you are ready to add some final touches that will make your presentation more interesting. Return to Slide 1, and fill the slide background with color. Be sure to apply the same color to all the slides so the same color will appear in the background of all slides in the presentation. (For help, refer to Multimedia Skill 4.3: To change a slide’s background color.)
- To help the presentation flow smoothly from one slide to the next, add transitions between all of the slides. To create a consistent visual look, consider applying the same transition to all slides.
Challenge: After you add transitions to your slides, go back and insert music or sound effects. (For help, see Multimedia Skill 7.1: To add a sound or music file from the Clip Gallery/Organizer, and Multimedia Skill 7.2: To add a sound or music file saved on your computer.) (Note: An icon for either a sound file or a music file will appear in your slide.)
- Play your presentation to make sure everything works correctly. Make any necessary changes.
- Save your work as directed.

Curriculum Preview Slide 1 Challenge Example
![]() Review It
Review It
Look over your curriculum preview presentation. Make sure it has the
following elements:
- A title slide with your school’s name, your name, information about the grade and classroom you teach in, and the dates of the school year that the presentation covers
- Slides for three classroom subjects that you plan to teach, in which each slide includes the name of the classroom subject or content areas, a list of three specific topics or skills, and a related picture
- A final slide with information that summarizes and concludes the
presentation - The same background fill color on all slides, and transitions that play
between slides
If any elements are missing, add them to the curriculum preview presentation now. You should also make other desired changes. Remember to save your work when you are finished.
![]() Share It
Share It
Be prepared to discuss your answers to the following questions during
sharing time:
- How might the information in your curriculum preview presentation be helpful to learners and parents?
- What are some ways that multimedia technology helps make this
information more interesting for your audience? - What is the most useful multimedia skill that you learned? Why?
