|
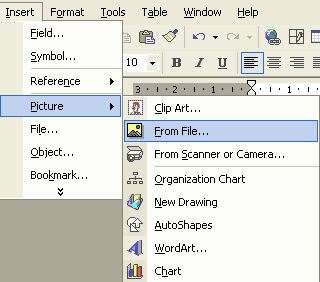
Click on the Insert
menu
Click on Picture

Click on From
File.
Look in the drive and folder where the picture
is saved. This may vary from person to person. The example
below looks in the My Pictures folder, but you may have
your own graphics folder.
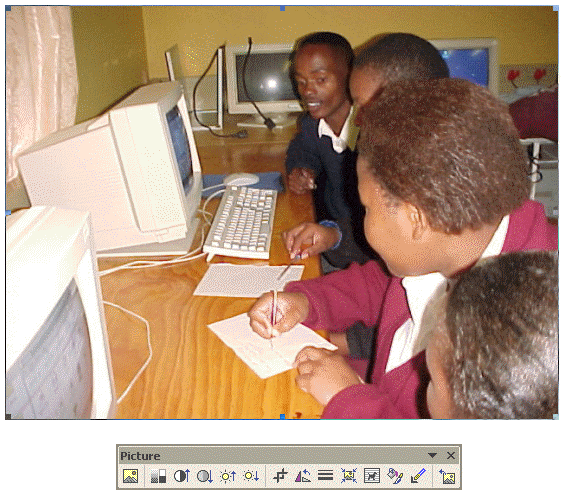
Click on the file name (in the example it is Mpophomeni)
and then click on Insert.

You may see a pop-up toolbar appear with
the picture as in the example below. If you do not see it,
click and drag the mouse on the picture as if you want to
move it. The menu will appear.

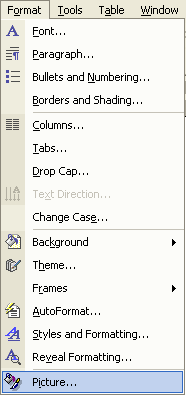
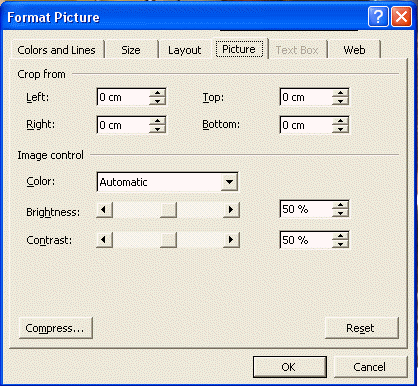
The same options that are on the pop-up
menu are also in the Format Picture menu.
Click on the Format menu
Click on Picture

You will have all the same options available
from the pop-up screen.

Moving a picture
If you want to drag your picture
around and re-position it, click and drag your mouse pointer
over the picture. It will only be able to be dragged into
positions on the page where text or space has already been
created. Click and drag on the graphic to move it around.
You will see a little box with a cross in it attach itself
to the mouse pointer while you are dragging the picture. Once
it is in position, release the mouse button.

To re-size a graphic
Click on the graphic to make it active.
Move your mouse pointer to one of the corners until you see
a diagonal double arrow (see the top left-hand corner of the
example below).
Note: Only resize diagonally from the corners (away from or towards the centre of the picture) so that you do not distort (squash) the image.

When you see the double arrow, click and
drag your mouse towards the centre of the picture. Release
the mouse button once you have the picture size you want.
|