|
Imagine a picture that can hyperlink to different web pages
depending on where you clicked on the picture. Imagine
a map of Africa, where if you click on the country of Zimbabwe
it will open at a web page about that country, or a click on
Egypt, it will open at a web page about that country.
Think of how many web pages that can be linked from a picture
of the human body.
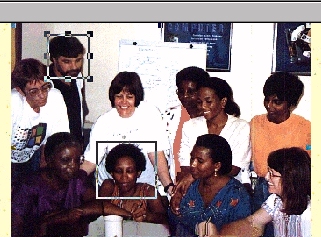
Look at the 'programmed' picture
or image map of the group of educators discussing a problem.
There are two hyperlinks from that picture. One hyperlink
is to a page on Principals and one to a page on Science teachers.
When the picture is viewed
on the World Wide Web with Internet Explorer or Netscape Navigator
the parts of the picture which are hyperlinked do not show.
You only know where the hyperlinked parts are found when you
pass your cursor over the part and a 'hand' appears.
If you click that 'hand' a web page opens, the page programmed
to that area of the picture.
How to make an image map
Select the picture. The
Picture tool bar appears.

Click on the Rectangular
Hotspot icon. By clicking and dragging make a rectangular
shape over the area to be hyperlinked.
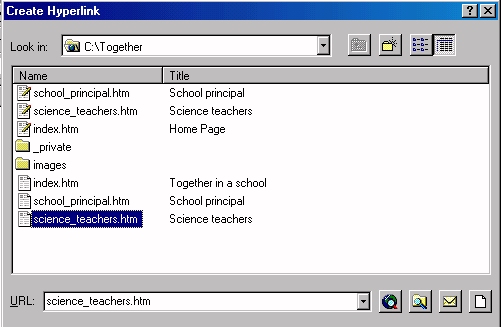
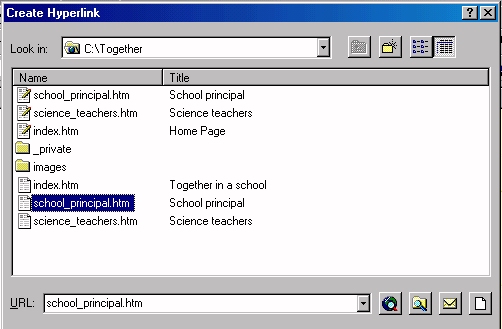
The Create Hyperlink
box opens. Select the file for the hyperlink, in this
case science_teachers.htm The name of the file
appears in the URL box. Click OK.
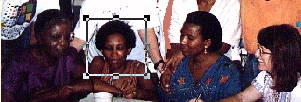
To make another hyperlink,
repeat the process. Do not overlap the hyperlink shapes.
The next hyperlink was to the
school_principal.htm page.
When viewed on the Internet
the hyperlinks within the image map are activated when moving
a cursor over them. By clicking on them one moves to
the target web pages.
|