|
Start Access
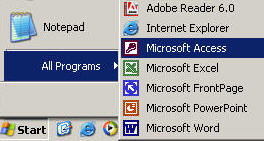
Click on the Start button, then point to All Programs, and click on the Access icon (if you are using Office 2003, you might need to go to the Microsoft Office 2003 menu item before you see the Access icon).
Create a Blank Database
When you open Access, you should see a task pane like this:
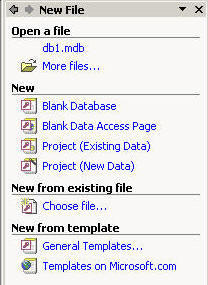
If it is not there, click File | New...

From the Task Pane, choose "Blank Database". You will be asked to save the file. Choose a suitable location and name for your database.
NOTE: This is the only time you will need to save the database file. Any data entered is saved automatically.
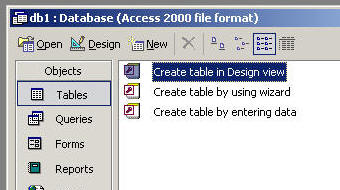
When the file is saved, you should see this screen. This is the database window.
Create a New Table
A Table is used to store information in a database. It is the most fundamental part of a database.
Make sure you have clicked on the Tables item in the Database window.
Double-click on "Create table in Design view".
This is the Table Design Window.
Your first Field should be an ID field, with Data Type of AutoNumber.
To do this, click in the Data Type column, and then choose from the drop down list.
Make this field a Primary Key by clicking on the small golden key icon on the toolbar.
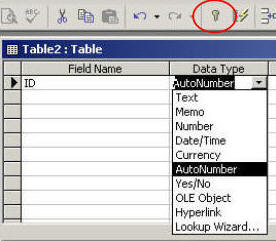
A Primary Key is important as it helps to keep the whole database well organised. By making it autonumber, it ensures that this field will always contain a different, unique value for each item added to the database.
Add other fields as you require. A field contains a specific kind of information. So you need to choose a data type for each field. Here is an example of the fields for a simple school records database.
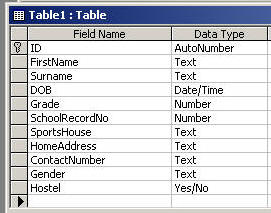
When you have finished creating fields, close the Table Design window, and click on Yes to save your table, and give it a suitable name.
Creating a Form
A Form is used to view or enter information in a database table. It is possible to enter data directly into a table, but it is easier using a form.
In the Database Window, make sure that you have clicked on Forms, then double-click on "Create form by using wizard".
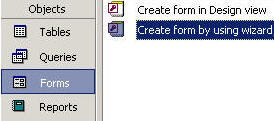
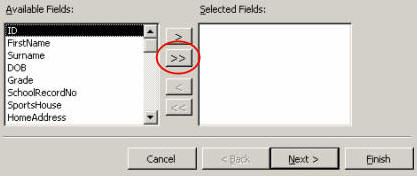
Select the fields you want on your form. Use the Double arrow (circled red) to select all the fields.
Then click the "Finish" button.
You should see a blank form. You will use the blank spaces on the form to fill in information for your first record (eg, in this example, a learner at your school). When you have filled it in, it should look something like this.
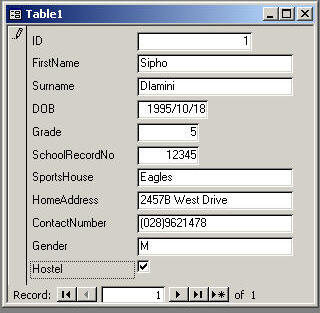
This information represents one RECORD.
To enter information for another record (eg a second learner), click on the new record button (circled red). This will allow you to create a new record. Repeat this process until you have entered all the learners in your class.

The other button here allow you to navigate through the records.
Sorting
It is possible to sort information in a database very quickly.
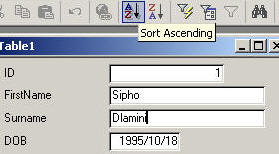
Click in the field you want to sort by (eg, surname), then click on the Sort Ascending button. You can also sort in descending order by clicking on the Sort Descending button.
Searching
If you are looking for a particular record, you can use the Find function.
Click in the field where you want to search, then click on the Find button.

In the dialogue box that opens, type in what you would like to find.
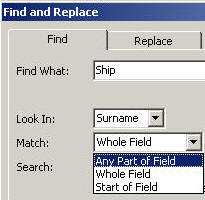
If you don't want to type the whole word/name, you can type the first few letters, and then choose "Any Part of Field" from the Match drop-down menu.
Filtering
If you want to see only records of a particular category (only Males), you can use a filter. Click in a field which is an example of the category, then click on the Filter by Selection button.

Once your database is filtered, you will see the word "Filtered" on the navigation bar at the bottom of the form.

To remove the filter, click the Remove Filter button.

Creating a Report
A report is used to create a paper document which presents some of the data in the database.
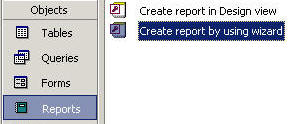
To create a Report, make sure you are in the Reports section of the database window.|
Double-click on "Create report by using Wizard".
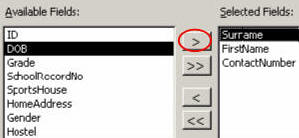
In the wizard, use the single arrow (circled red) to select the Fields you would like on the Report. You can choose them in any order. Click on the Finish button.
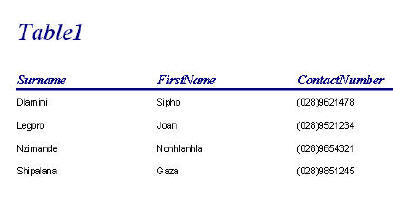
You should see a report which looks something like this.
|